


Best Baked Meatballs
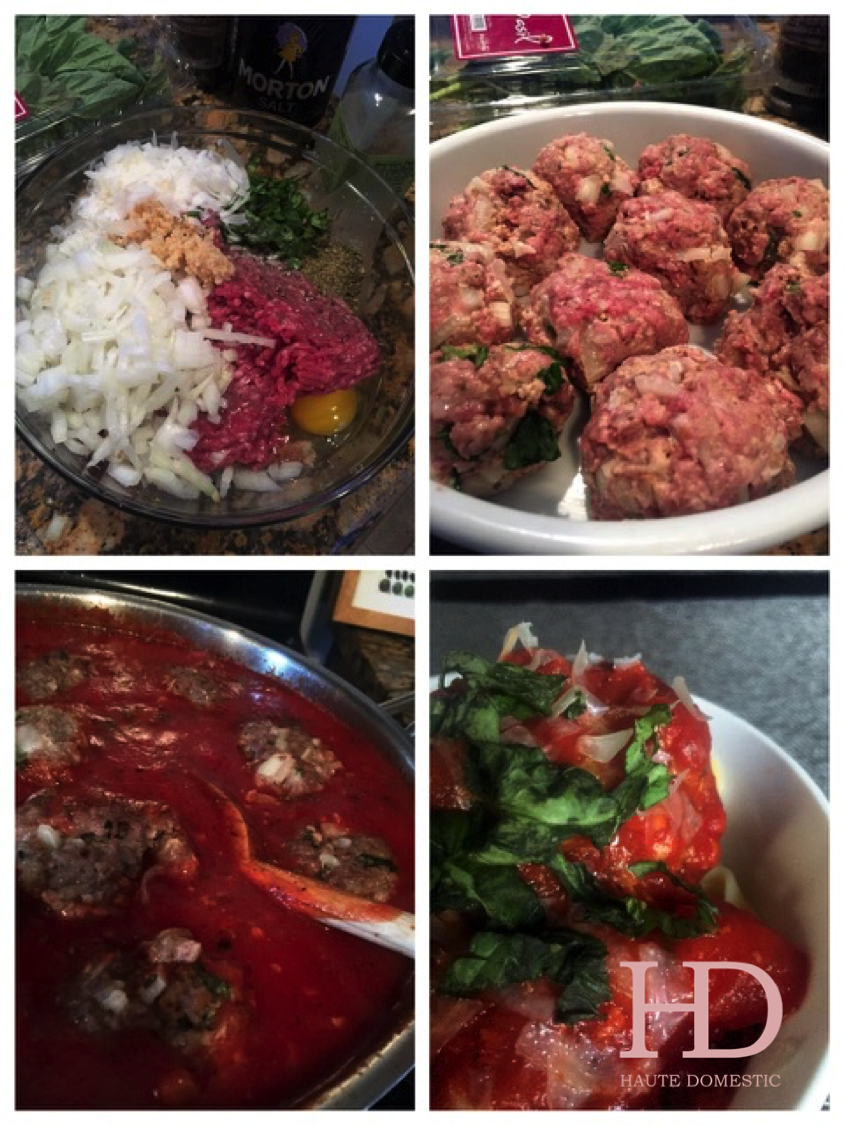
Growing up, we often had spaghetti, but never spaghetti and meatballs. Meat sauce was the go to option. Of course a meat sauce is classically delicious and simple, but as a very food focused kid, I always yearned for meatballs. Our play kitchen’s plastic spaghetti came with three plastic meatballs. The families on Friday night sitcoms had spaghetti and meatballs. I was slightly annoyed by my childhood lack of meatballs, but not enough so to risk demanding them of my hardworking mother. I accepted our meat sauces and moved on.
As a college student in Washington, D.C., I had the chance to have tons of awesome professional experiences, and with them, work events. Drinks were always served, and of course, in the spirit of young professionalism, I would politely decline- but of course, always indulged in the food. The first real spaghetti and meatballs I ever had were served at one of these events. When I spotted the servers coming around with plates piled high with pasta and meatballs, I fought my best to hide my excitement, continuing to idly chat with coworkers and clients, while underneath the table, my feet were tapping in anticipation.
Timeless Chocolate Chip Cookies
I don’t really work out, because I detest it. Who wants to sweat, struggle to breathe, be sore the next day? Not this girl. But spring has finally hit in Michigan, and with it, that weird, innate desire to exercise. After hiding in jeans and bulky sweaters all winter, you realize that the stores are selling dresses and cutoffs again, and shoot. Maybe I should start jogging in the morning?
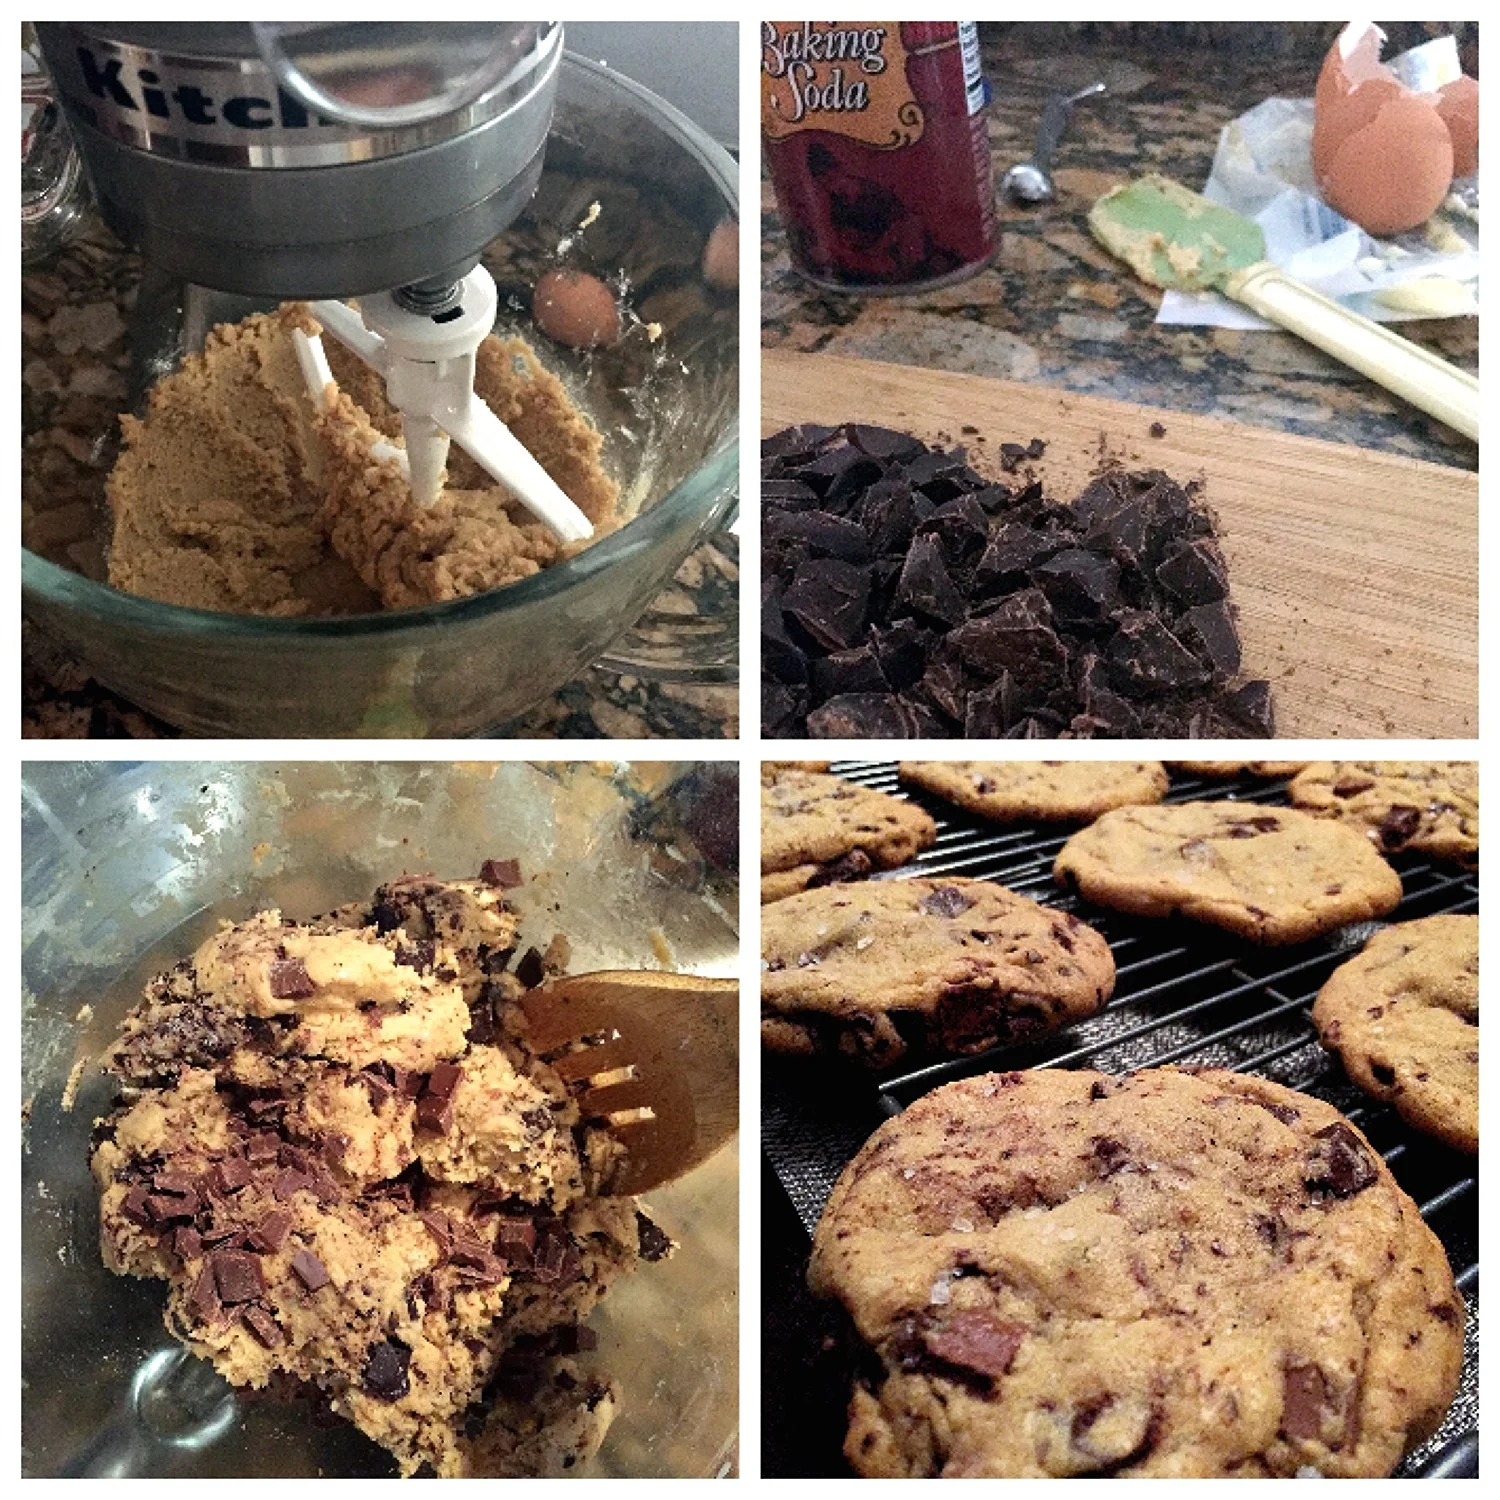
I’m about three days into my likely short-lived workout phase, and I don’t think I’m doing too great a job. My outfits definitely fit the bill, but my kitchen behavior this week doesn’t. As you can tell from the post title, and the tantalizing photos- I made a lovely batch of chocolate chip cookies this week. A couple weeks ago, boyfriend and I reminisced about my last batch of cookies, and he asked me to whip him up some chocolate chip. And naturally, I put it off until I the week I started working out, in an effort to improve my “summer body”. Makes total sense.
But my timing doesn’t matter, because chocolate chip cookies are timeless! I’m usually not the hugest fan of the dessert category, but these cookies change that. I think part of their allure is their size- it’s the perfect little serving of delicious childhood nostalgia. Well, until you eat three or four. Then it’s three or four serving sizes of nostalgia. Whatever. While I keep trying to workout and fighting the urge to make another batch of these, you all should try this recipe. File it into your recipe memory bank. Or you can just bookmark this page. Whatever you need to do to keep this recipe close by.

What You’ll Need:
A cookie sheet
Silicone liner or parchment paper, cut to size
A cooling rack
2 cups + 2 tablespoons of all purpose flour
1 cup of light brown sugar
½ cup of white sugar
½ teaspoon of baking soda
1 room temperature egg
1 room temp egg yolk
1 ½ sticks of softened butter
A tablespoon of vanilla extract
A cup of chocolate chips (I do about ¾ a cup of dark chocolate and ¼ of milk chocolate)
Sea salt (for optional garnish)
What To Do:
Prepare your baking sheets. If using parchment paper instead of silicone baking mats, cut the parchment paper to the size of your baking sheet. Sift your flour and baking soda into a mixing bowl and set aside.
Fit your stand mixer with a paddle attachment. Whip the butter in the bowl on medium speed for about three minutes, until its nice and light. Add both sugars to the butter, and continue to work for about four or so minutes. Add the egg, yolk, and vanilla, and mix until well incorporated.
Gradually add your flour and baking soda into the mixture, which will start to form your dough. I add it in four parts. Once all your flour is incorporated, fold in your chocolate chips. Cover the entire bowl and allow to chill in the fridge for at least half an hour, or at most overnight.

Preheat your oven to 325 degrees. Roll the dough into same-sized balls and place on the cookie sheet, about three inches apart. Flatten them a little with your palm. Bake in the oven for about eight minutes for chewier cookies, or about ten for crispier. When they come out the oven, let them cool on the sheet for two minutes, until they’re firm enough to transfer to your cooling rack. While the cookies are still hot, sprinkle with a little sea salt if you’re into the sweet and salty mix like me.

Tips:
Sit your eggs and butter out for a couple of hours, or even overnight to make sure they’re at room temperature. Room temperature ingredients always make for better baked goods.
Lots of recipes tell say you can leave the dough in the freezer for up to three days, but I beg to differ. In my experience, the dough becomes hard and compact once it’s been in the fridge for longer than a day.
Make sure your dough balls are the same size. Use an ice cream scoop or tablespoon to ensure they’re the same. When they’re different sizes, they don’t cook evenly. You’ll end up with some chewy, some overcooked, some crispy. Not a good look.
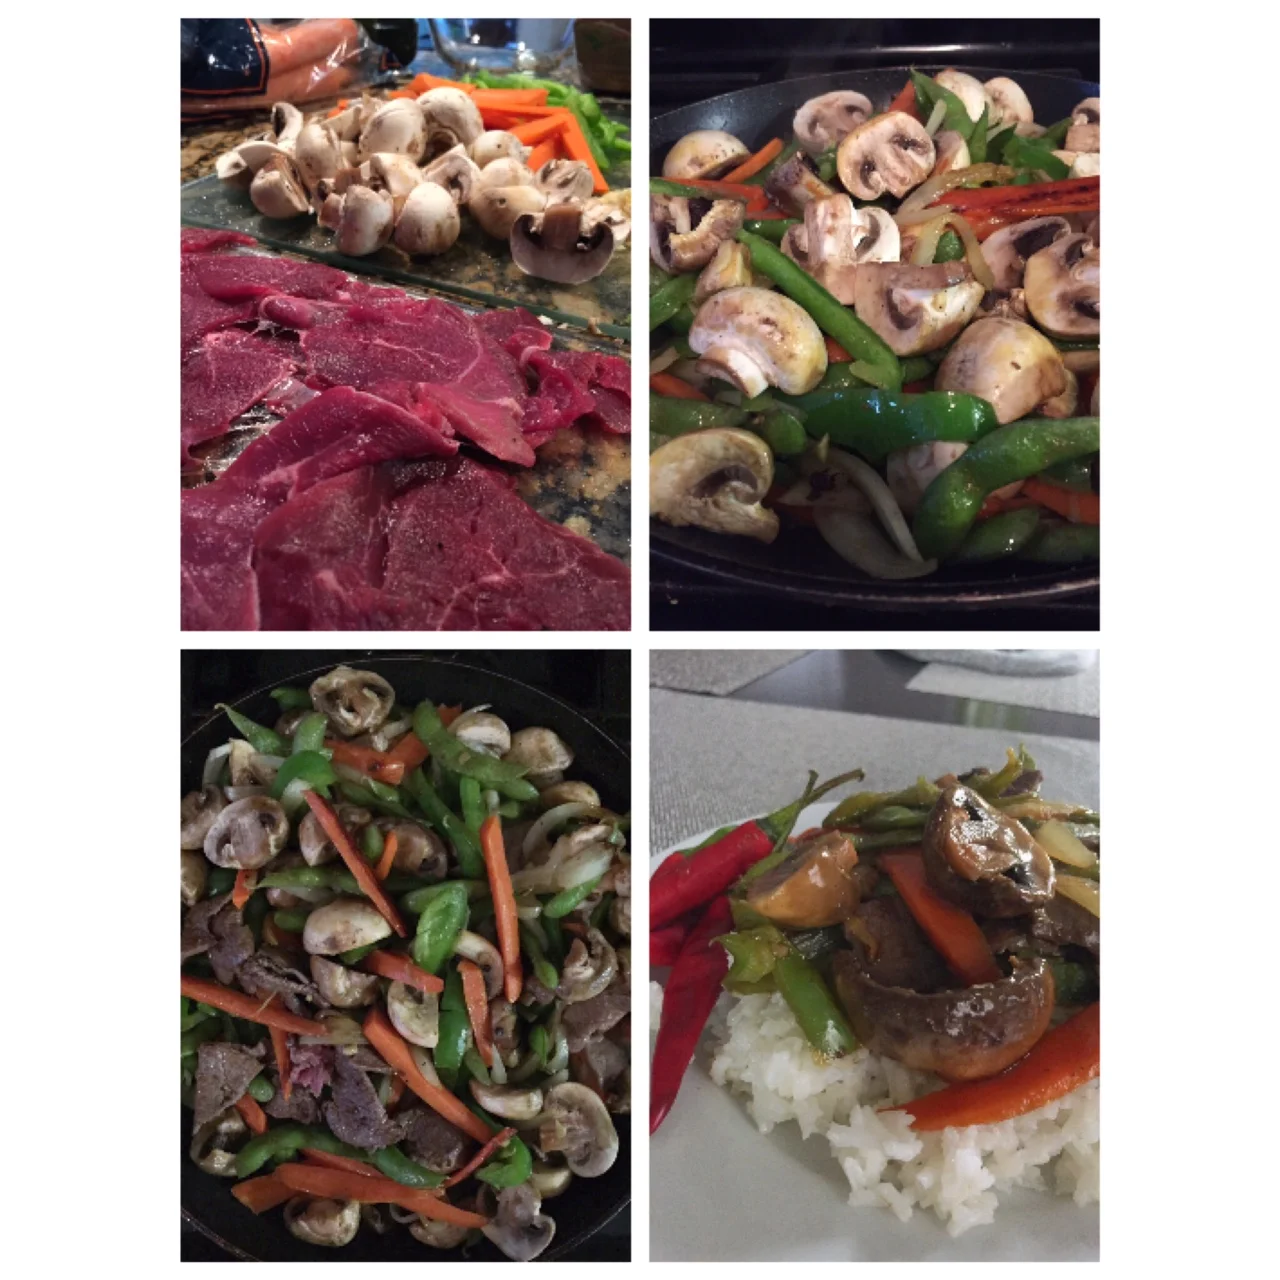
Quick Beef Stir Fry
My love of stir -fry began really early on. I knew that I loved the way the vegetables were cut, how colorful they were all sautéing together in a large frying pan. I knew that I couldn’t get enough of the slightly sweet sauce soaked into fluffy white rice. But what I didn’t know was that it was my mother’s busy weeknight secret weapon. After a long day of work, school, and dance classes, I’d stand in the kitchen and marvel at how quickly my mom made this miraculous meal come together. No doubt she was dead tired, but she made it look effortless. I literally remember thinking to myself, “I’ll definitely make this all the time once I’m a grown up.” Fast forward twenty or so years and I’ve kept my childhood promise to myself. I make quick stir-fries all the time.
There’s such beauty and finesse in making something so fulfilling in such a short time. The finished product is so casually impressive (if that even makes any sense), and it’s perfect for anyone who’s busy, tired, or pressed for time. It’s done quickly, it’s super filling, and there’s only one pot to wash. And it’s so adaptable! Chicken, steak, sans meat, whatever, no biggie. There’s no limit to the combination of vegetables you can use- or not use. If you absolutely hate peppers, just substitute them for whatever fresh or frozen veggie you have hanging around. Stir-fry is one of the simplest staple meals to conquer. Get into it.
What You’ll Need:
Vegetable or canola oil
A tablespoon of minced garlic
One medium to large onion
A medium to large green pepper
Two large, skinned carrots
A regular sized package of button mushrooms
Fresh ginger root
About a pound of finely cut steak (leaner cuts are best for this recipe)
Dash of red pepper flakes (optional)
Chopped green onion for garnish
For the Sauce:
1/2 cup of soy sauce (I use the low sodium version)
1/8 cup of rice wine vinegar (regular white can work in a pinch)
1 ½ tablespoons of honey
1 tablespoon of minced garlic
½ teaspoon of ground ginger or a teaspoon of fresh
A splash of fish sauce (optional)
2 tablespoons of cornstarch
What To Do:
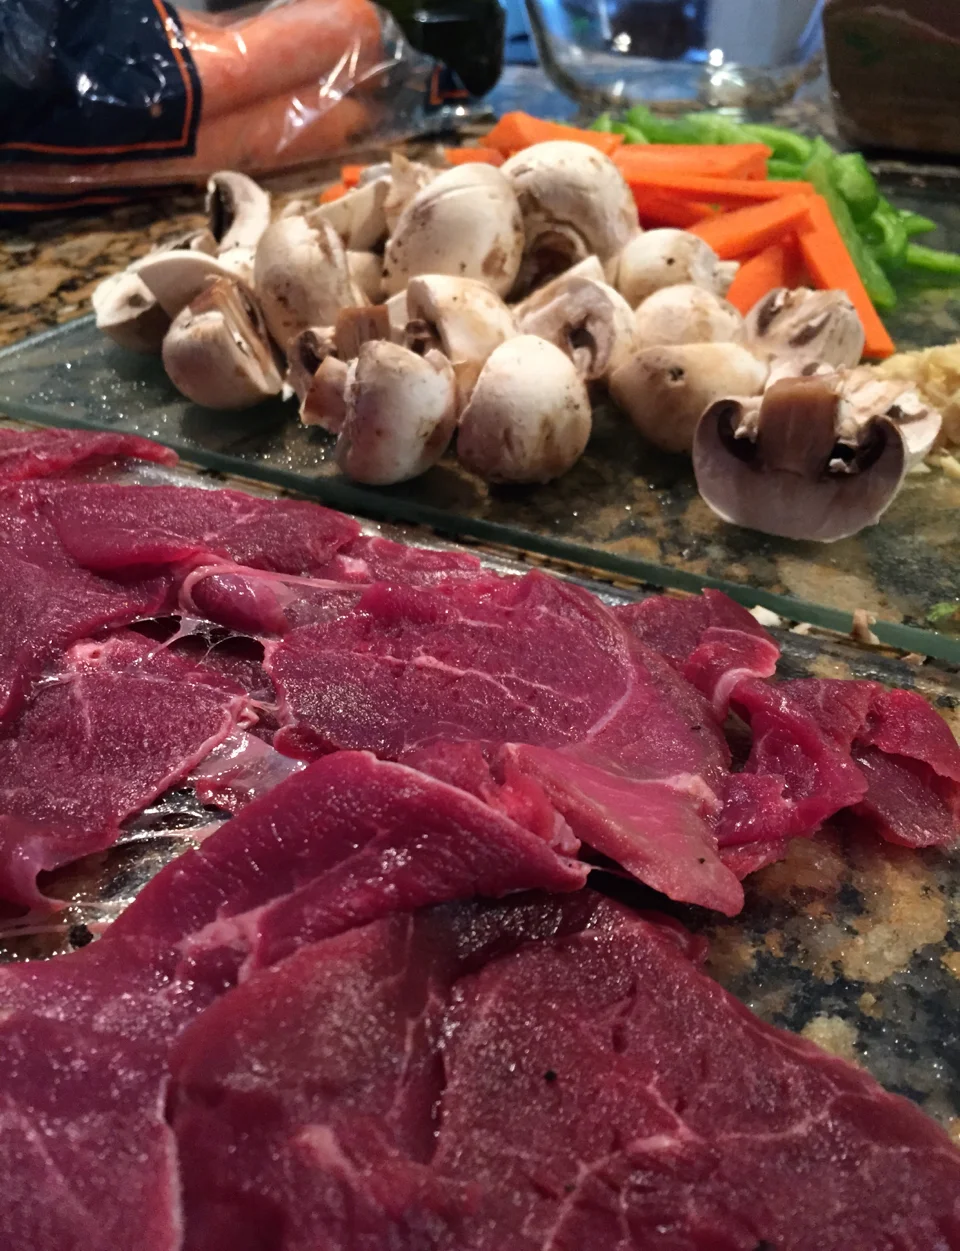
Take a minute to prepare your ingredients. Rinse fresh produce, and pull any frozen produce out the freezer to have nearby. Peel and slice the carrots and onion, peel and mince the fresh ginger, chop your mushrooms, slice your green pepper. Whisk together your soy sauce, rice wine vinegar, honey, additional garlic and ginger, optional fish sauce, and cornstarch in a small mixing bowl. Set aside for later.
Heat about three tablespoons of oil in your sauté pan or wok on medium high heat. It may seem like a lot of oil for a stir-fry, but there’s a lot of vegetables to get through. Add your minced garlic and ginger, and let them heat up a bit, for about a minute at most, pushing them around in the pan. Make sure to not let them burn, they’re the basic flavor profile of your entire dish.
Season your steak lightly with salt and pepper, and to the pan. For my thin cut, I let it brown for about two minutes on each side, so that it’s still slightly pink in the middle. It’ll get more time in the pan later. Remove from the pan and sit aside to rest.
Now time for the vegetables. Add the carrots to the pan first, as they take the longest to cook. Give them about two minutes in there alone, then add the green peppers. After about a minute, add the onions. A minute later, the frozen edamame, and another minute later, the chopped mushrooms.
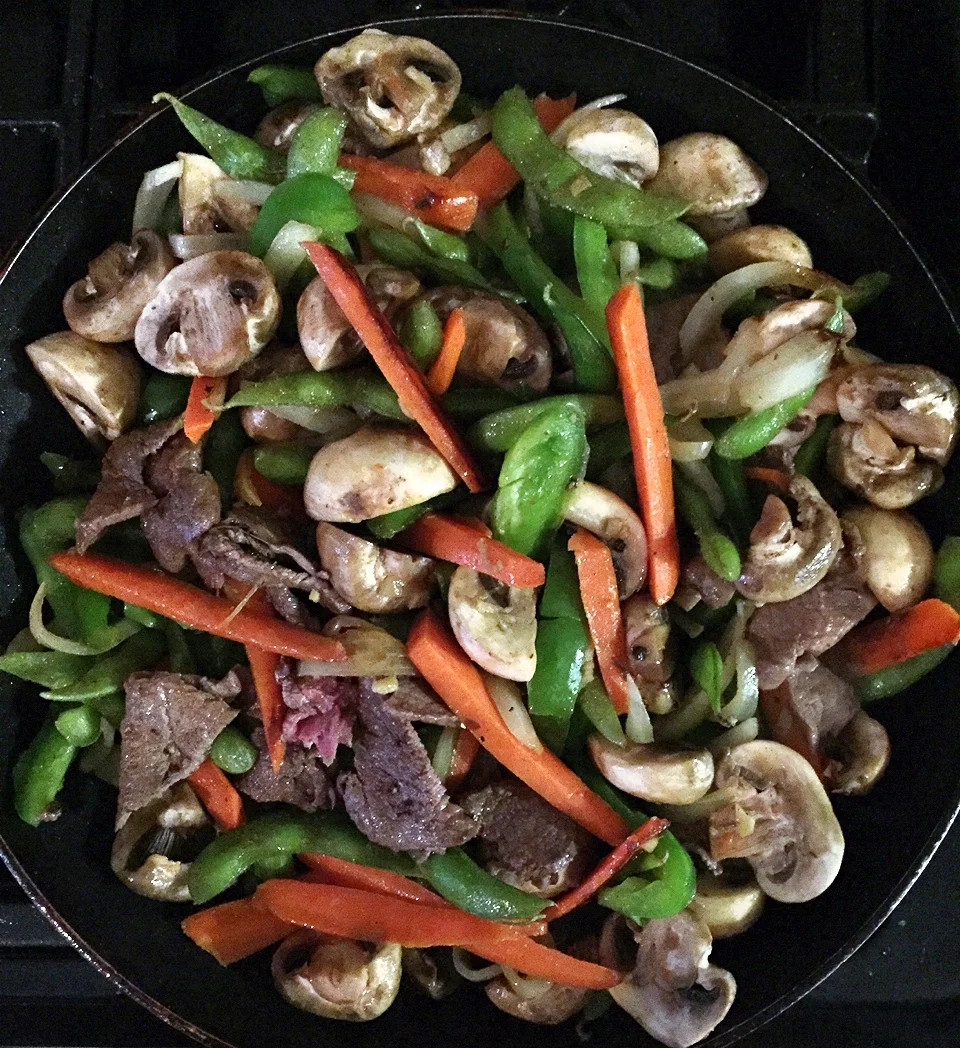
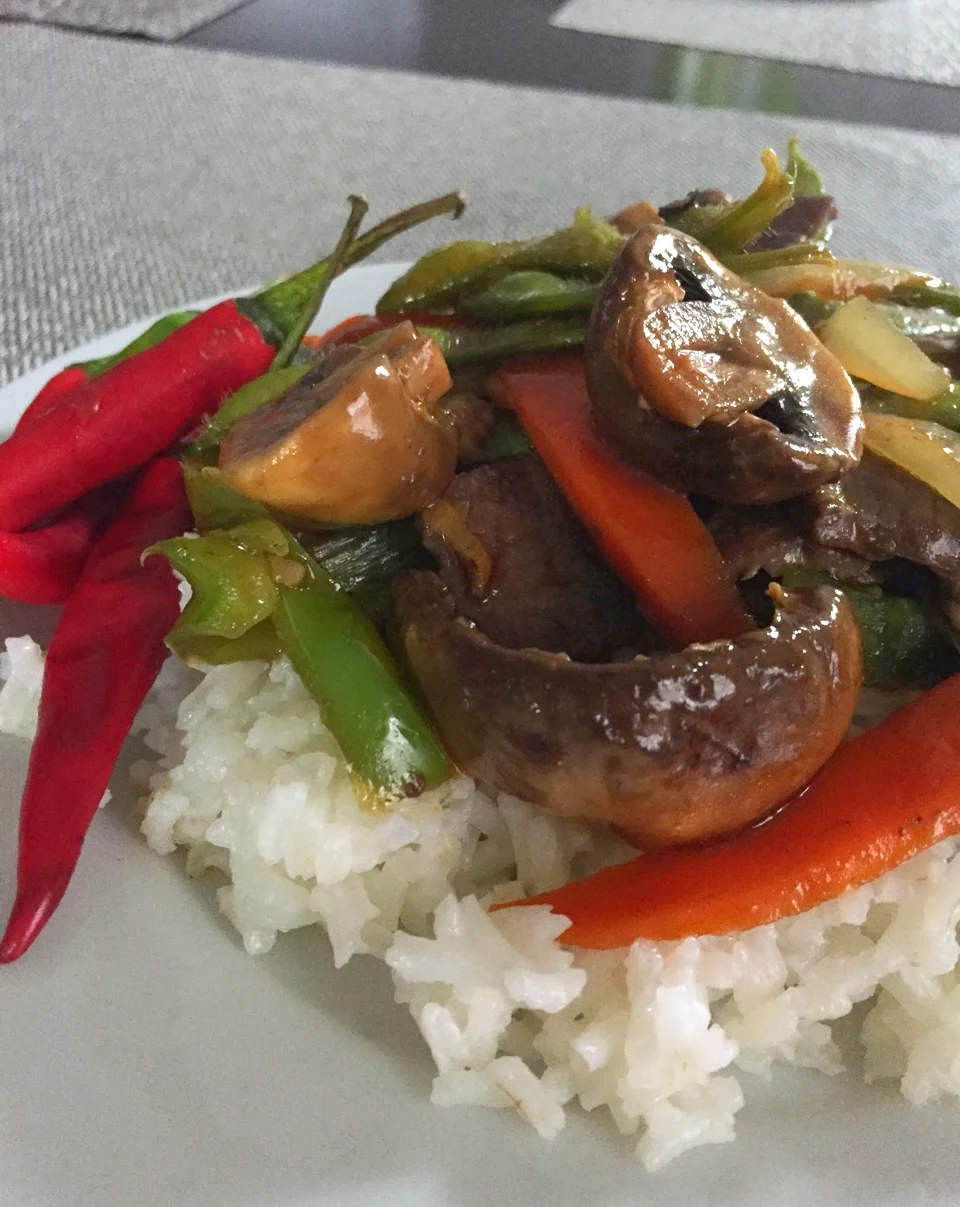
Slice your steak in about a two-inch width. Throw it in the pan with the veggies, which should be just about finished cooking. We’re almost done! Pour the sauce over your veggies and give everything a good stir to make sure everything gets coated. Give it about two minutes in the pan, and you’re done! Serve over fluffy white rice.
Tips:
Before anything goes onto the heat, have your ingredients pre-washed and cut. For a perfect stir-fry where none of the vegetables are overcooked and the meat stays tender, you’ll need everything prepared and ready to toss in as you go along.
A wok is ideal for making a stir-fry, but if you don’t have one, don’t worry! My mother never had a wok, and neither do I. Just make sure you use a somewhat shallow sauté or frying pan that’s wide enough to fit your ingredients- because everything will be cooked in that one pan.
Remember that stir-fries are the most subjective and adaptable meals on the planet. Fresh ginger is great, but if you only have ground, it’ll still turn out great. Adjust your ingredients to fit your family’s needs- I left out spice to accommodate for a toddler, but feel free to dial up the heat with red pepper flakes if you can handle it!
The haute in domestic
This is a block field
You can put any content in here.
Etiam porta sem malesuada magna mollis euismod. Vestibulum id ligula porta felis